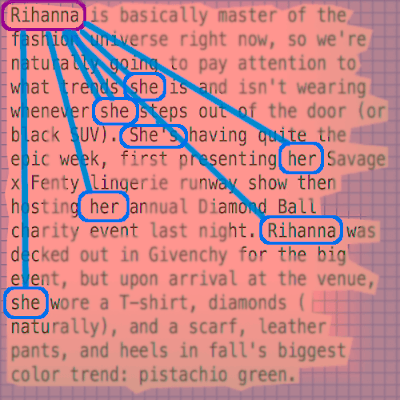
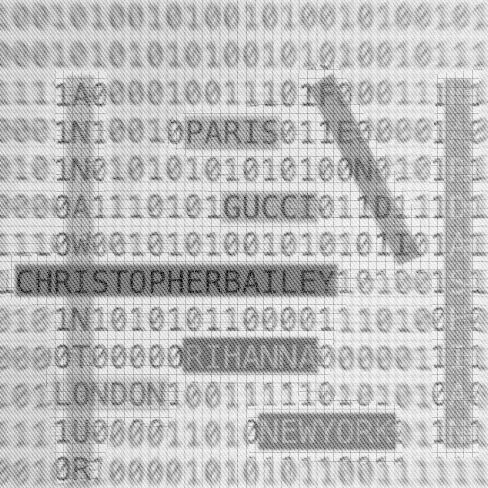
Inspiration credit: the text in this graphic is from an article in Vogue magazine, which can be found here.
Named Entity Recognition, NER, is a common task in Natural Language Processing where the goal is extracting things like names of people, locations, businesses, or anything else with a proper name, from text.
In a previous post I went over using Spacy for Named Entity Recognition with one of their out-of-the-box models.
In the graphic for this post, several named entities are highlighted in the text.
- New York, Manhattan, Los Angeles are locations.
- Fashion Week and the Academy Awards are event names.
- Michael Kors, Marc Jacobs, and several others are names of people or brands.
To extract named entities, you pass a piece of text to the NER model and it looks at each word and tries to predict whether the word fits into a named entity category such as person, location, organization, etc.
Problems arise when the text data you're trying to label is too different(yes, very subjective) than the text data that was used to train the Named Entity Recognizer you're using, and it might not be very good at labeling your data.
If a Named Entity Recognizer was trained on academic papers that use formal language, it might not work so well at identifying named entities in text from YouTube comments where the language used is much more casual and uses a lot of slang.
The solution in that case could be to collect a bunch of YouTube comments and train a custom NER model with them.
In this post I will go over how to train a custom Named Entity Recognizer with your own data.
The full code can be found here.
Training Data
The first thing you need is training data, which needs to be in the correct JSON format for Spacy.
TRAIN_DATA = [
        ("Uber blew through $1 million a week",
                    {"entities":
                        [(0, 4, "ORG")]
                        }
                    ),
        ("Google rebrands its business apps",
                    {"entities":
                        [(0, 6, "ORG")]
                        }
                    )
                ]
This example of the data format was taken from the Spacy docs.
Each training example is a tuple containing the raw text and a dictionary with a list of entities found in that text.
Each entity in the list is a tuple containing the character offset indices for where the entity starts and ends in the text, along with the entity label.
In the first example, the entity 'Uber' starts at index 0 and ends at index 4 and has the label 'ORG'.
My training data is a collection of fashion articles that were scraped from various blogs and websites.
I have another post on training a custom Named Entity Recognizer with Stanford-NER, and I am using the same data to train this model as I did there.
Don't forget test data!
Make sure that you keep some of your annotated data separate for testing the model after it's trained.
Your test data should not be used to train the model.
How to annotate the data?
There are a lot of services out there for annotating data.
My project was low budget, so I just used the Sublime text editor and wrote a couple of plugins.
It was somewhat hacky, but it got the job done - I will just quickly outline my process.
- Each text example is in its own file in a directory.
- Open a text file in Sublime.
- Highlight entities.
- I used a keybind for each entity type(name, location, etc) that I was annotating, which would copy the offset indices for the highlighted text, along with the entity type, and put it in a CSV file corresponding to the text file. It would also do things like search for other occurrences of the entity with regular expressions.
So then I had a bunch of text files with corresponding CSV files of the entities with their offsets, and just had to compile it in the JSON format that Spacy needs.
Training the model
The model will be trained using supervised learning, which is why we have to provide training data examples for it to learn from.
You can read more about Spacy models here.
During training, the model learns by looking at each text example, and for each word tries to predict the appropriate named entity label. It calculates an error gradient based on how well it predicted the correct labels and then adjusts model weights to improve future predictions.
Setup
First create a virtualenv for this project and install Spacy, as well as the language model you want to use.
I'm using the English model.
mkvirtualenv spacyenv
pip install -U spacy
python -m spacy download en
Import Spacy and other necessary modules.
import random
import pickle
import spacy
from spacy.util import minibatch, compounding
I imported pickle because my training data is stored in a pickle file.
with open('training_data.pickle', 'rb') as data:
    TRAIN_DATA = pickle.load(data)
You can either start with a pre-trained model to add new entities to, or create a blank model.
if model is not None:
    nlp = spacy.load(model)
else:
    nlp = spacy.blank("en")
If you're starting with a blank model, which I did, you have to add the "ner" pipeline to it for training.
if "ner" not in nlp.pipe_names:
    #if it's a blank model we have to add the ner pipeline
    ner = nlp.create_pipe('ner')
    nlp.add_pipe(ner, last=True)
else:
    #need to get the ner pipeline so that we can add labels
    ner = nlp.get_pipe("ner")
If you're starting with a pre-trained model, you will have to disable some of the other pipelines it currently has, while keeping "ner".
other_pipes = [pipe for pipe in nlp.pipe_names if pipe != "ner"]
Then add the entity labels from your training data to the pipeline.
for _, annotations in TRAIN_DATA:
    for ent in annotations.get("entities"):
        ner.add_label(ent[2])
Time to train!
with nlp.disable_pipes(*other_pipes):
    if model is None:
        nlp.begin_training()
    for itn in range(number_iterations):
        random.shuffle(TRAIN_DATA)
        losses = {}
        batches = minibatch(TRAIN_DATA,size=compounding(4.0, 32.0, 1.001))
        for batch in batches:
            texts,annotations = zip(*batch)
            nlp.update(
                    texts,
                    annotations,
                    drop=0.5,
                    losses=losses
                )
        print("losses", losses)
This part can take awhile.
-
At each iteration, the training data is shuffled so that the model doesn't learn or make generalizations based on the order of the training data.
-
Minibatching splits up the data into smaller batches to process at a time.
-
The model is updated by calling nlp.update which will step through the words in the input text for each example in the batch, and the model attempts to predict the correct label for each word and adjusts the model weights according to whether it has predicted correctly or incorrectly.
-
A dropout rate drop=0.5 helps prevent overfitting by randomly dropping features during training so that the model will be less likely to simply memorize the training data examples. Here the rate of 0.5 means each feature has a 50% likelihood of being dropped.
Check out the Spacy docs for more on this as well.
Saving the model
Once the model is trained, you can save it to disk.
output_dir = '/path/to/model/dir'
nlp.to_disk(output_dir)
Load and test the model
As I mentioned earlier, my training data came from fashion articles, so I'm using a test sentence here from an article in Vogue magazine.
import spacy
nlp = spacy.load(path/to/model)

test_text = 'Chanel, Christian Dior, and Louis Vuitton have all ceased their far-flung travels and opted to treat their clients to immersive French experiences this season.'

test_doc = nlp(test_text)
for ent in test_doc.ents:
    print(ent.label_, ent.text)
And it correctly identified Chanel, Christian Dior and Louis Vuitton.
Improving the model
You can improve the model by experimenting and tweaking things.
- Minibatch sizes
- Dropout rates
- Make sure you have good, representative training data examples for the type of model you want to train, and gather more training data if necessary.
Thanks for reading!
As always if you have any questions or comments, write them below or reach out to me on Twitter @LVNGD.

