This part is in JavaScript.
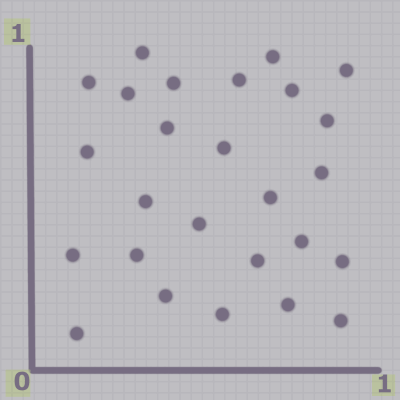
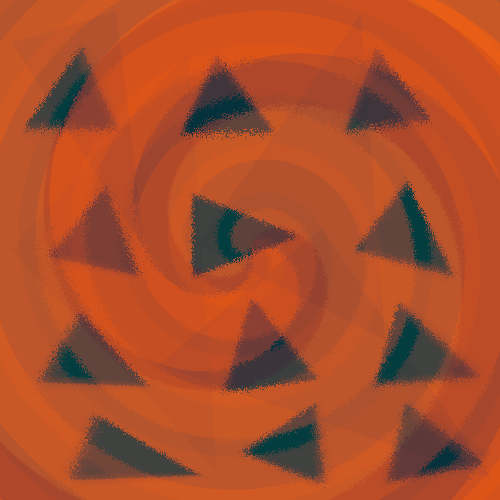
To start off, we are generating some random 3-D points.
Yes, the graphic is 2-D, but I wanted to show that the points are generated in the unit square.
const coordinateCount = 16;
const numCoordinateVertices = 3; // x,y,z
const numVerticesWithPadding = numCoordinateVertices + 1;

var testPoints = [];
for (let i = 0; i < numVerticesWithPadding * coordinateCount; i++) {
    testPoints.push(Math.random());
}
So we have 16 random (x, y, z) coordinates.
The basic idea with the compute shader is that we have an array of 16 point coordinates, and each Morton Code will be computed in its own thread, in parallel.
You might notice that we've generate an array of 64 numbers - 16 x 4 - why did we do that if we are working with 3-D coordinates?
vec3
I added the extra number as padding because I will be using a vec3f data structure in the shader.
Vec3f represents a vector with three floating point numbers.
- Since vec3 requires padding in WebGPU, I am generating four numbers for each coordinate, and the last one isn't used.
- Read more about WebGPU Memory Layout to find out more about the need for the extra padding.
Copy Points To the GPU
We generated the points in JavaScript.
...but everything else will be done on the GPU.
So first we need to copy the points data to the GPU.
We will do this by:
JavaScript Float32Array
Convert the array of generated points to a typed array in JavaScript.
const mortonCodeInput = new Float32Array(testPoints);
Create a GPU Buffer
Create a GPU buffer to store the data.
let mortonCodeInputBuffer = device.createBuffer({
    label: 'morton code points input buffer',
    size: mortonCodeInput.byteLength,
    usage: GPUBufferUsage.STORAGE | GPUBufferUsage.COPY_SRC | GPUBufferUsage.COPY_DST,
});
Write Data to the GPU Buffer
Write the typed array to the GPU buffer.
device.queue.writeBuffer(mortonCodeInputBuffer, 0, mortonCodeInput);
Another GPU Buffer for the output
I'm also going to create a separate GPU buffer for the Morton Code output.
let mortonCodeOutputBuffer = device.createBuffer({
    label: 'morton code buffer',
    size: mortonOutputBufferSize,
    usage: GPUBufferUsage.STORAGE | GPUBufferUsage.COPY_SRC | GPUBufferUsage.COPY_DST,
});
The computed Morton Codes will be written to this buffer.
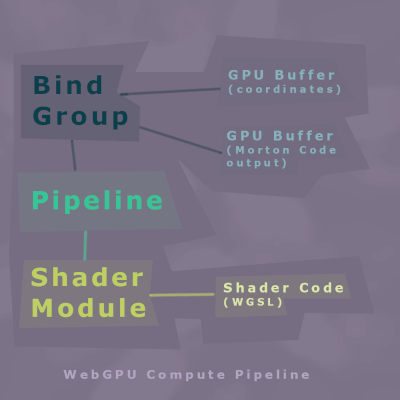
WebGPU Compute Pipeline
Before we talk about the actual shader code to compute Morton Codes, let's go over the structure of the compute pipeline.
The compute pipeline consists of everything we need to set up to run our compute shader.
There are three components in WebGPU:
- Shaders
- Pipelines
- Bind Groups
1. Shader Module
We will create a shader module, which contains the shader code to compute the Morton Codes.
const mortonCodeModule = device.createShaderModule({
    label: 'compute morton codes from input points',
    code: < SHADER_CODE_STRING_HERE > ,
});
- I left out the actual shader code to save space, but you can view it here.
The shader code is a string, and you can use string substitution for any variables you need to add that need to be added before the program compiles.
We will come back to the actual shader code in a bit.
2. Pipeline
Then we create a WebGPU pipeline.
const mortonCodePipelineLabel = 'morton code pipeline';

const mortonCodePipeline = device.createComputePipeline({
    label: mortonCodePipelineLabel,
    layout: 'auto',
    compute: {
        module: mortonCodeModule,
        entryPoint: 'computeMortonCodes',
    },
});
- Pass the shader module to it.
- Along with the entry point, which is the specific shader function name to be run.
You can have more than one function in a shader module.
You just need to make sure to reference the correct function when you create a pipeline.
You can see in the gist that the function is named computeMortonCodes.
3. Bind Group
Lastly, we will create a bind group for the pipeline we just created.
const mortonBindGroupLabel = 'bind group for morton code compute';

const mortonBindGroupEntries = [{
        binding: 0,
        resource: {
            buffer: mortonCodeInputBuffer
        },
    },
    {
        binding: 1,
        resource: {
            buffer: mortonCodeOutputBuffer
        },
    }
];

const mortonCodeBindGroup = device.createBindGroup({
    label: mortonBindGroupLabel,
    layout: mortonCodePipeline.getBindGroupLayout(0),
    entries: mortonBindGroupEntries
});
This will tell the compute pipeline how to use the GPU buffers passed to it.
The bind group entries correspond with the storage arrays in the shader program that I mentioned earlier:
@group(0) @binding(0) var<storage, read> data: array<vec3f, coordinateCount>;
@group(0) @binding(1) var<storage, read_write> dataOut: array<u32>;
The binding numbers in the bind group and corresponding shader code need to match.
In WebGPU, you are mostly responsible for data/memory management to make sure things are aligned correctly - the vec3 issue from earlier is similar.
If things aren't aligned correctly, you will either get an error or other potentially difficult-to-debug problems in your shader.
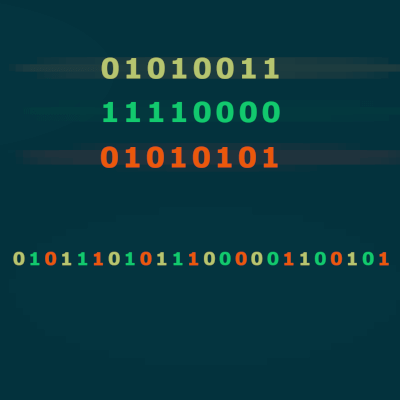
Morton Code Compute Shader
As I mentioned earlier, we are taking the binary representation of the coordinates, and interleaving them together.
fn expandBits(v: u32) -> u32
    {
        var vv = (v * 0x00010001) & 0xFF0000FF;
        vv = (vv * 0x00000101) & 0x0F00F00F;
        vv = (vv * 0x00000011) & 0xC30C30C3;
        vv = (vv * 0x00000005) & 0x49249249;
        return vv;
    }

fn morton3D(x: f32, y: f32, z: f32) -> u32
    {
        var xx = min(max(x * 1024.0, 0.0), 1023.0);
        var yy = min(max(y * 1024.0, 0.0), 1023.0);
        var zz = min(max(z * 1024.0, 0.0), 1023.0);

        var xxE = expandBits(u32(xx));
        var yyE = expandBits(u32(yy));
        var zzE = expandBits(u32(zz));
        return xxE * 4 + yyE * 2 + zzE;
    }
The Morton Codes are computed for each coordinate set in parallel.
let i = id.x;
let mc = data[i];
dataOut[i] = u32(morton3D(mc.x, mc.y, mc.z));
The first line gets the global invocation id for the workgroup invocation.
- data corresponds to the input buffer - the raw coordinates.
- This is the vec3f from earlier - if we had not added the extra padding to the buffer, the shader would not read in the data correctly and would likely not cause an error, so you would just have wonky, unexpected results.
- dataOut corresponds to the Morton Code output buffer.
In this example, the workgroup size is 16, corresponding to the array of 16 coordinate sets in data.
So we get the coordinate from each index, compute the Morton Code, and then write it out to the same index in the dataOut array.
Run the Compute Pipeline
Time to run the code!
We need to do a few things first:
const encoder = device.createCommandEncoder({
    label: 'morton encoder'
});

const pass = encoder.beginComputePass({
    label: 'morton compute pass'
});
Then we set the pipeline and bind group.
pass.setPipeline(mortonCodePipeline);
pass.setBindGroup(0, mortonCodeBindGroup);
And in this example we are dispatching one workgroup.
pass.dispatchWorkgroups(1);
A Note on Workgroups
- In this post/example I've kept things pretty simple as far as workgroups go - we are dispatching a single workgroup.
- We have a workgroup size of 16 in the compute shader code, which corresponds to the length of our array of coordinates.
- So that will work out to running 16 threads in parallel, in this example.
I will talk more about workgroups in the coming posts - this is where I have run into issues with WebGPU, so lots more on that to come!
For now, WebGPUFundamentals has a great post that goes into detail on workgroups.
Now we can end the compute pass.
Print Results to the Console
We need a separate buffer which we will copy the Morton Code output results to, in order to print them to the console.
I would recommend reading the WebGPU fundamentals article - the part about compute shaders has a good explanation of why we need to create this separate buffer to print the output in JavaScript.
The main thing here to note is that the buffer has the GPUBufferUsage.MAP_READ usage flag.
let mortonCodeBufferResult = device.createBuffer({
    label: 'morton codes output result',
    size: mortonCodeOutputBuffer.size,
    usage: GPUBufferUsage.MAP_READ | GPUBufferUsage.COPY_DST
});
Copy the Morton Code output buffer to the result buffer.
encoder.copyBufferToBuffer(mortonCodeOutputBuffer, 0, mortonCodeBufferResult, 0, mortonCodeBufferResult.size);
Copying the buffer is just another command that we are adding to the compute pipeline, but we have not yet actually executed the pipeline yet.
So that is why we are adding it here.
Finish and Submit the Command Encoder
Now we've got all of our commands in the command buffer, and we can finish and submit it for WebGPU to execute.
let commandBuffer = encoder.finish();
device.queue.submit([commandBuffer]);
Map and Print results to console
await mortonCodeBufferResult.mapAsync(GPUMapMode.READ);
const mortonCodeResult = new Int32Array(mortonCodeBufferResult.getMappedRange());
console.log('morton codes: ', mortonCodeResult);
In the console you should see the integer representation of the Morton Codes.
Thanks for reading!
I hope this has been a helpful overview on compute shaders in WebGPU.
Like I mentioned earlier, this is a simplified example extracted from the full project.
I am still figuring out how to organize the full project code!
Let me know if you have questions or if anything doesn't make sense.