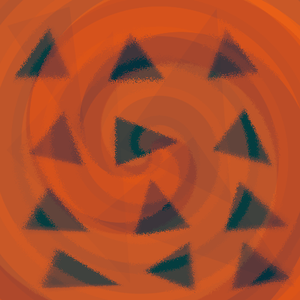
Have a look at my notebook on Observable as a preview as well.
The goal is to use this visualization as the background of a website, and in this post we are going to set up the code using three.js that will allow us to incorporate a custom fragment shader.
In the second post, we will go through the shader code in detail.
But first, let's step back and talk about what all of this even is!
What is a fragment shader?
In graphics programming, a fragment shader is a program that runs on the GPU.
It is written in a language called GLSL (short for GL shader language), which is a strongly-typed language similar to C
It is responsible for determining the color and other attributes of each pixel (fragment) making up an object on the screen.
In this project, we will be using a 2-D rectangle object that fills the background of a website, and applying a fragment shader to it.
If you've seen sites such as Shadertoy, this shader will be similar to something you might find on there.
We will be using the three.js library, which provides boilerplate code for setting up WebGL and managing its state.
In this first post we will go over setting up the three.js app.
WebGL Basics
WebGL is a JavaScript API based on the OpenGL graphics library, which allows for the creation of interactive 3D graphics that can run in a web browser without the need for any plug-ins or other third-party software.
You can access the WebGL API through the HTML canvas element.
At the core of a WebGL program are two main components: vertex and fragment shaders.
Vertex Shader
The vertex shader takes coordinates and other attributes that define some kind of geometry as inputs.
In WebGL there are three types of drawing primitives:
points
lines
triangles.
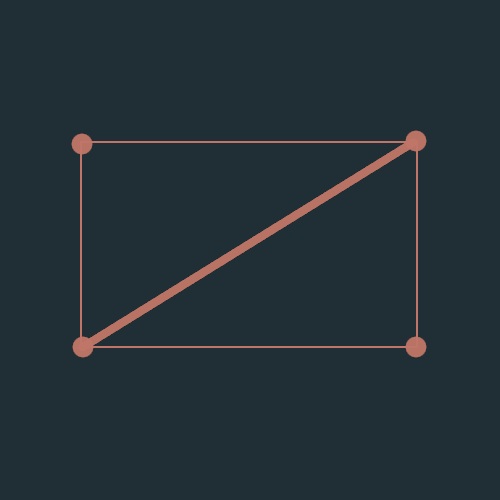
Most shapes, such as this 2-D rectangle, are made up of triangles.
The vertex shader converts the input coordinates to clip space, which range from -1 to 1 in all dimensions.
For example:
Your input data might be 2-D input coordinates with ranges:
0 <= x <= 500
0 <= y <= 200
Vertices with coordinate values falling outside of the clip space range will not be rendered, so converting them is important.
This part will be taken care of in three.js and we don't have to worry about it.
Fragment Shader
After the vertex shader computes vertex positions for the input data, the fragment shader computes the color for each pixel making up the object(s) on the screen.
This is done in parallel for all of these pixels.
The shader will output a color for each pixel.
Each pixel is processed independently in its own thread and has no knowledge of what is happening in any other thread, which can make writing fragment shaders a bit of a challenge at first.
Shaders written in GLSL can be stored in non-JavaScript script tags, for example like this:
Next we will go over the three.js structure of the code.
I also have to recommend this great tutorial on the three.js website that goes into detail on the various components that we will touch on in this post.
Scene | Camera | Renderer
The basic objects in three.js that are required to render anything are:
scene
camera
renderer
The scene will be rendered with the camera.
First let's import three.js.
import * as THREE from 'three';
And initialize some variables.
let camera,scene,renderer;
Scene
The scene is like a container that holds the objects you want to render.
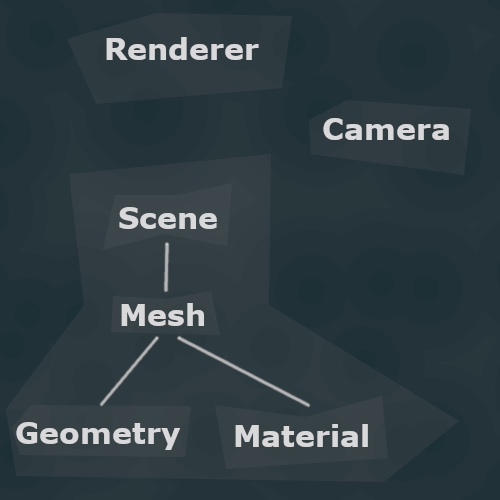
In the graphic above, you can see that:
The scene will contain a mesh object.
The mesh object holds geometry and material objects, which correspond to the rectangle and the fragment shader.
scene = new THREE.Scene();
scene.background = new THREE.Color( 0x000000 );
We are just making a pretty basic 2-D visualization and don't need to worry too much about the camera, aside from the fact that we have have it to render anything.
The tutorial I mentioned earlier builds a basic 3-D cube animation and goes into more detail on cameras.
Renderer
The renderer takes the scene and camera as input, and generates the 2-D image that is ultimately displayed on the screen.
I mentioned earlier that we can access the WebGL API through the canvas element.
<canvas id="glCanvas"></canvas>
So we will query for that element and use it to initialize a three.js WebGLRenderer object.
And with this, we have the basic structure set up to render an image on screen.
Now we need to tell three.js what to render by adding some stuff to the scene we've created.
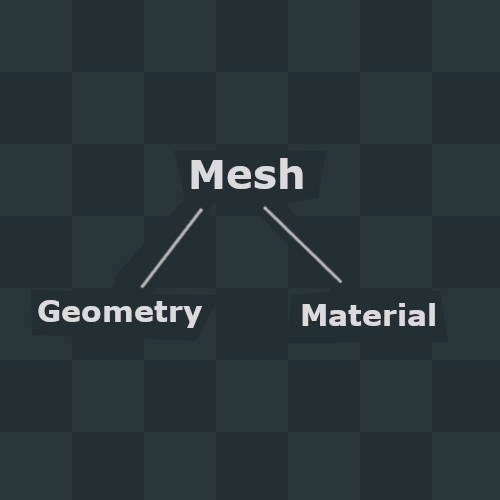
Mesh | Geometry | Material
A material determines the appearance of the geometry.
This visualization will consist of:
a rectangle geometry
our fragment shader to color in the rectangle
We will create a Mesh object that packages together these two things.
Geometry
We're using the built-in PlaneGeometry object in three.js - this is a 2-D geometry in the x-y plane.
const plane = new THREE.PlaneGeometry(window.innerWidth, window.innerHeight);
We've passed it the window width and height, so it will take up the entire viewport.
Material
We need to create a material to describe how the rectangle should be colored in.
The ShaderMaterial object in three.js allows us to add our custom fragment shader like so:
const material = new THREE.ShaderMaterial( {
    uniforms: {
        u_resolution: new THREE.Uniform( new THREE.Vector2() ),
        u_mouse: new THREE.Uniform( new THREE.Vector2() )
    },
    fragmentShader: document.getElementById( 'fragmentShader' ).textContent,
} );
Uniforms
Somehow we need to be able to access the current mouse coordinates in the shader, so that we can rotate each triangle towards that location.
We can pass in variables from the JavaScript code, called uniforms, and they contain values that are the same over all pixels.
We are passing two uniforms, which are both vectors with an x and y component.
u_resolution - viewport resolution, this is used in case the window is resized
u_mouse - mouse coordinates
Shader code
Earlier I mentioned that we can write the actual GLSL shader code inside of a script tag:
<script id="fragmentShader" type="x-shader/x-fragment">
#GLSL code will go here
</script>
Here we are passing a reference of that to the ShaderMaterial object.
It is currently empty because we haven't written the shader yet!
A Mesh object ties it all together
Now we create the mesh object, which takes our geometry object and applies the material to it.
Starting out with general purpose computing on the GPU, we are going to write a WebGPU compute shader to compute Morton Codes from an array of 3-D coordinates. This is the first step to detecting collisions between pairs of points.
In this post, I am dipping my toes into the world of compute shaders in WebGPU. This is the first of a series on building a particle simulation with collision detection using the GPU.
Finding the Lowest Common Ancestor of a pair of nodes in a tree can be helpful in a variety of problems in areas such as information retrieval, where it is used with suffix trees for string matching. Read on for the basics of this in Python.